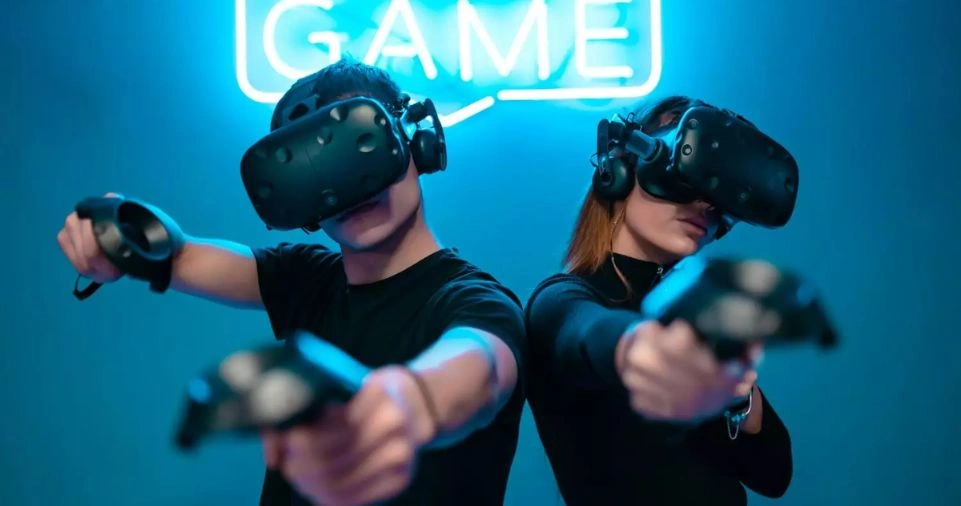
Virtual Reality (VR) has become a revolutionary platform for gaming and interactive experiences.
As the technology grows, players and creators alike want to capture and share their adventures in immersive worlds.
However, recording VR gameplay can be more challenging than traditional screen capture due to the unique hardware, software, and perspective challenges.
This guide outlines comprehensive steps, tips, and tools to help you record and share your VR gameplay efficiently.
Why Capture VR Gameplay?
Before diving into the technicalities, it’s essential to understand why capturing VR gameplay is valuable:
- Content Creation: Gamers and influencers create engaging content for platforms like YouTube, Twitch, and TikTok.
- Memory Preservation: Relive personal gaming moments and achievements.
- Tutorials and Reviews: Provide guides, walkthroughs, and product reviews.
- Sharing with Friends: Share experiences with others who don’t have access to VR setups.
- Debugging and Analysis: Developers can analyze user interactions within VR environments.
Tools You Need to Record VR Gameplay
The tools required for capturing VR gameplay can vary based on the headset and platform. Here’s a breakdown:
| Tool | Description |
|---|---|
| VR Headset | Hardware like Oculus, HTC Vive, PlayStation VR, etc. |
| PC/Console | Platform for running the VR headset. |
| Screen Recording Software | OBS Studio, ShadowPlay, or built-in recording tools. |
| Capture Card | For recording from consoles or standalone headsets. |
| Microphone | To record commentary alongside gameplay. |
| Editing Software | Adobe Premiere, Final Cut Pro, etc., for polishing. |
ALSO READ: How to Increase Immersion in VR Games with Accessories?
Step-by-Step Guide to Capture VR Gameplay

Understand Your VR Setup
VR gameplay recording depends on your specific headset and platform. Let’s examine the major types:
- PC-based Headsets: Oculus Rift, HTC Vive, Valve Index, etc., rely on PCs for gameplay and recording.
- Standalone Headsets: Oculus Quest and similar devices function independently.
- Console-based Headsets: PlayStation VR connects to PlayStation consoles.
Each setup requires different recording strategies.
Set Up Screen Recording Software
Recording software is crucial for capturing VR gameplay. Popular options include:
OBS Studio (Open Broadcaster Software):
- Free and open-source.
- Compatible with most VR setups.
- Allows custom overlays, layouts, and audio tracks.
NVIDIA ShadowPlay:
- Ideal for NVIDIA GPU users.
- Low performance impact.
AMD ReLive:
- Similar to ShadowPlay for AMD GPU users.
Built-in Tools:
- Oculus Quest has a native recording feature accessible through its interface.
- PlayStation VR uses the console’s capture functionality.
Configure Display Settings
Ensure your VR gameplay looks good in recordings:
- Mirror Display: Most VR headsets mirror gameplay onto your monitor. Use this window for recording.
- Aspect Ratio and Resolution: Adjust settings for widescreen (16:9) output.
- Field of View (FOV): Some headsets allow tweaking FOV to reduce black borders.
Capture High-Quality Audio
Good audio quality enhances your content:
- Use a high-quality microphone for commentary.
- Separate in-game audio and microphone inputs for post-editing flexibility.
- Consider noise suppression plugins to reduce background sound.
Minimize Performance Impact
VR is resource-intensive. Recording on the same system can strain performance:
- Lower graphics settings slightly to maintain smooth gameplay.
- Use a secondary PC for recording via a capture card.
Edit Your Footage
Editing can transform raw gameplay into polished content:
- Add intros, outros, and captions.
- Insert overlays and animations.
- Sync audio and video perfectly.
Export and Share
Export your edited video in a format optimized for your platform. For instance:
| Platform | Recommended Format |
|---|---|
| YouTube | MP4, H.264 codec, 1080p or 4K. |
| Twitch | Stream directly or upload clips. |
| TikTok/Shorts | Vertical format, 1080×1920. |
Advanced Techniques for VR Recording

Third-Person VR Recording
While most VR gameplay recordings show a first-person perspective, third-person footage can offer a unique angle:
- Use an external camera within the VR environment to capture your avatar.
- Tools like LIV or Virtual Desktop enable mixed reality recordings, blending real-world footage with VR.
Green Screen Integration
Mixed reality videos often require green screens:
- Position a green screen behind the player.
- Use chroma key in editing software to superimpose the player into the VR environment.
Streaming VR Gameplay
Live streaming VR gameplay adds extra engagement:
- Use platforms like Twitch, YouTube, or Facebook Live.
- Test your setup for latency and performance.
- Interact with viewers via chat overlays.
Troubleshooting Common Issues
Performance Drops
Recording can lower frame rates. Solutions:
- Lower in-game settings.
- Record to a separate drive to reduce strain.
Audio Sync Issues
If audio and video desync:
- Use software to delay audio.
- Ensure your microphone and game audio are synced in OBS or other software.
Distorted Graphics
VR footage may appear warped due to lens distortion:
- Use tools to correct fisheye effects.
- Adjust settings in editing software.
Popular Platforms for Sharing VR Content

| Platform | Strengths |
|---|---|
| YouTube | Broad audience, monetization opportunities. |
| Twitch | Ideal for live interactions and gaming streams. |
| TikTok | Short-form, viral potential. |
| Engage niche communities. | |
| Share with friends and groups. |
Tips to Maximize Engagement
- Catchy Titles and Thumbnails: Create eye-catching thumbnails and titles for YouTube.
- Optimize Metadata: Use relevant keywords for SEO. For example, “VR Gameplay Oculus Quest 2.”
- Engage with Your Audience: Reply to comments and ask for feedback.
- Collaborate: Partner with other VR content creators to expand reach.
- Keep It Short and Sweet: Edit long gameplay sessions into concise highlights.