Building a budget gaming PC doesn’t have to be a daunting or expensive task. With careful planning and the right components, you can assemble a high-performance system that handles modern games smoothly without overspending.
In this guide, we’ll walk you through the essential steps, from selecting the right parts to assembling your PC, ensuring you get the best value for your money.
Whether you’re gaming at 1080p or looking for a future-proof build, we’ll help you create a rig that delivers excellent performance at a fraction of the cost of pre-built systems. Let’s dive into building your budget gaming powerhouse.
Why Build Your Own Budget Gaming PC?
Building your own gaming PC can be the most cost-effective way to get the performance you need, and it comes with the bonus of learning how your machine works.
By purchasing individual components, you can often save money and avoid the markup that comes with pre-built systems.
Additionally, building a PC yourself means you get to choose the parts that best fit your needs and budget, ensuring that you’re getting the best value for your money.
For example, when I built my first PC, nothing happened when I switched it on. After a long, frustrating day of disassembly and research, I learned that the motherboard required a firmware update.
While it didn’t go smoothly, that experience taught me valuable lessons that helped me build a budget gaming PC with confidence later.
The bottom line is: if you follow a well-thought-out plan, your build will work—and the sense of achievement when it does is worth every moment.
The Tools You Need
Before you dive into assembling your budget gaming PC, make sure you’re prepared with the right tools and setup:
A Spacious, Static-Free Workspace
A large table is essential because you’ll have parts everywhere. Building on a carpet is a no-no, as static electricity can destroy sensitive components. If you can, invest in an anti-static mat to keep things safe.
Essential Tools
You’ll only need two primary tools to get started:
- A decent Philips screwdriver (size 0 or 1) with a magnetic tip and a long shaft. The magnetic tip helps hold onto screws in tight spaces.
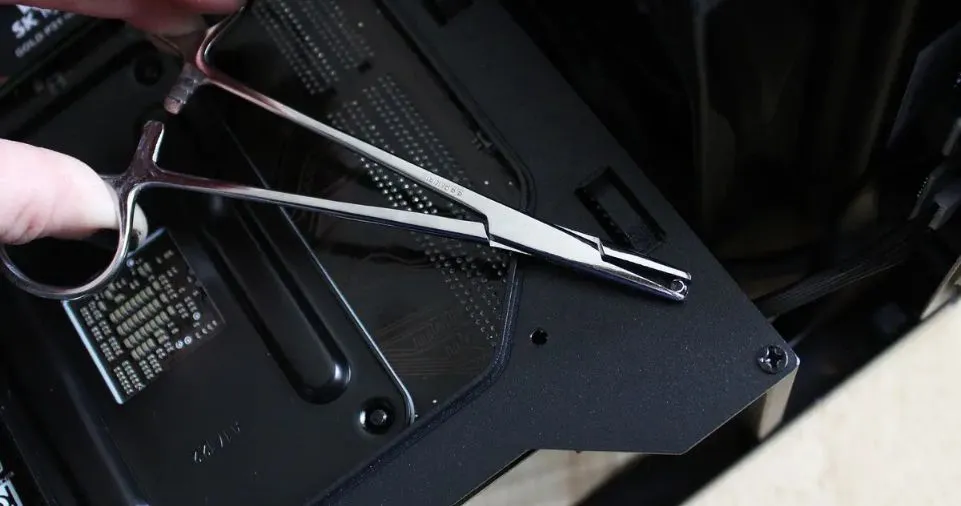
- A pair of long-nose pliers, which are invaluable for fishing out screws dropped behind the motherboard or into hard-to-reach areas.
A Flexible Lamp
PC building often requires close attention to detail, so having a powerful lamp (even a headlamp) can save you from unnecessary frustration when working in tight spaces.
Key Considerations for Your Build
Building a budget gaming machine means you’ll need to make some compromises. However, these compromises don’t mean you need to settle for subpar performance. When considering the right balance of components, there are two primary aspects to focus on:
Resolution vs. Refresh Rate
If you want the best visual fidelity, go for a machine that can handle 1440p or even 4K resolution. However, keep in mind that high resolution often means lower frame rates.
If you’re after smooth gameplay, a higher refresh rate (measured in Hz) will offer a much better experience.
For a budget build, 1080p resolution and 60-144Hz refresh rates are ideal, offering a great gaming experience without breaking the bank.
Balanced CPU and GPU
Experts suggest aiming for a balanced performance between the CPU (Central Processing Unit) and GPU (Graphics Processing Unit).
If one is significantly more powerful than the other, you’ll run into bottlenecks, where the less powerful component limits the overall performance. A balanced approach will ensure that your gaming experience is smooth and stable.
Selecting the Right Parts
To build a budget gaming PC, you need to carefully choose the right parts. Below is a breakdown of the key components, along with some of my personal choices and recommendations:
Motherboard
The motherboard is the heart of your PC, connecting all components. When selecting a motherboard, ensure it’s compatible with your CPU and GPU.
I chose the MSI MAG B760 Tomahawk, a relatively affordable yet feature-packed motherboard with excellent connectivity, multiple M.2 slots for SSDs, and impressive software for performance analysis.
CPU
Your CPU is crucial for overall system performance. I went with the Intel Core i5-13400F. This 10-core processor is both powerful and energy-efficient, and it’s perfect for gaming without being overpriced.
The i5-13400F will easily handle most current and upcoming games, offering solid single-thread and multi-thread performance.
GPU
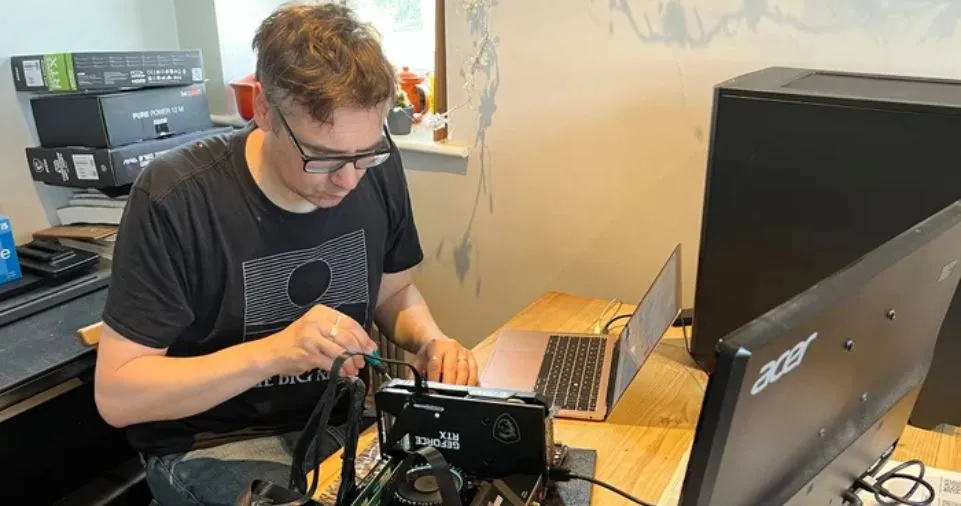
The MSI Ventus 2X Nvidia GeForce RTX 3050 is a great choice for budget gaming. It offers impressive visual performance for 1080p gaming, handling titles like Apex Legends and Resident Evil 4 at high settings.
You could upgrade to an RTX 3060 for a bit more performance, but for most players, the 3050 strikes a good balance between price and power.
If you want even more affordable options, the GTX 1050 Ti is still a solid performer for around £150.
Case
I opted for the Be Quiet! Pure Base 500DX, which provides ample space for components and ensures good airflow.
This case also includes built-in fans and subtle RGB lighting, making it both functional and visually appealing. A larger case like this will also make it easier to manage cables and install components.
PSU
Power supply units are often overlooked, but they are essential to ensuring a stable and safe build. I went for the Be Quiet! Pure Power 12 M, which is modular, allowing you to only use the cables you need, reducing clutter.
It’s quiet, reliable, and offers enough power for most mid-range builds. For a tighter budget, you could go with Corsair or EVGA PSUs for around £50-£70.
Storage and Memory
For storage, an SSD is crucial for fast load times. I opted for the Crucial 1TB P3 SSD, which offers excellent read/write performance without the high cost of more premium options.
For memory, 16GB of DDR4 RAM is the sweet spot, but I went with 32GB of Crucial DDR4 to future-proof my build and ensure smooth multitasking during gaming sessions.
Building the PC
Once you’ve gathered all your parts, it’s time to get your hands dirty. Here’s a general step-by-step for assembling your PC:
- Prepare the Case: Before installing the motherboard, ensure that the case has all its standoffs in place (small metal pegs that the motherboard will screw into). Attach the I/O shield (the back panel) to the case, ensuring it’s properly aligned.
- Install the CPU: Carefully insert the CPU into the motherboard socket. Make sure it’s aligned properly, with the marked corner matching the socket’s key. Once in place, lock the CPU into position using the retention arm.
- Install the RAM: Insert the RAM sticks into their respective slots, pressing down until you hear a click.
- Attach the Motherboard to the Case: Align the motherboard with the I/O shield and screw it into place using the standoffs.
- Install the PSU: Slide the power supply into the bottom or top of the case (depending on your case design) and secure it with screws. Plug in all necessary power cables to the motherboard, GPU, and storage devices.
- Install the GPU: Slide the GPU into the PCIe slot on the motherboard, ensuring it clicks into place, and then screw it into the case to secure it.
- Connect Storage: Mount your SSD or HDD into the drive bay and connect the necessary data and power cables to the motherboard and PSU.
- Connect Front Panel Ports: Attach the front panel connectors (USB ports, power button, etc.) to the motherboard headers.
- Test the System: Before closing up the case, connect the system to a monitor, keyboard, and mouse, and power it on. If it boots up successfully, you’re ready to close the case and secure all screws.
Where to Save Money

If you’re looking to trim costs even further, consider the following:
- CPU and GPU: You can opt for an Intel i3-13100 processor (£120) and a GTX 1050 Ti GPU (£150) for a solid gaming experience on a tighter budget.
- Motherboard: An Asus TUF Gaming motherboard at £130 offers good value, especially if you don’t need all the premium features.
- Case and PSU: There are excellent budget cases from Antec and Thermaltake available for around £50. EVGA and Corsair offer reliable PSUs for £50-£60.
With these changes, you can reduce the total cost to around £585 without sacrificing too much gaming performance.
Conclusion
Building a budget gaming PC doesn’t have to be overwhelming. With the right components, a little patience, and careful planning, you can put together a machine that handles modern games at 1080p with ease.
If you’re mindful of your budget, make informed choices, and follow a structured approach, you can build a powerful gaming rig for much less than you’d pay for a pre-built system. So go ahead, grab your tools, and get building. You’ve got this!